Tartar And Plaque:Remove Methods Without A Dentist
Tartar and plaque, known as dental calculus, form on teeth when plaque accumulates and starts to harden. Not only is tartar visually unappealing, but it

Are you fed up with discovering mold on your toothbrush sanitizer when you’re just trying to keep things hygienic?
Well, hold onto your toothpaste because we’re about to embark on an adventure into the realm of toothbrush sanitizers and their unexpected nemesis – mold.
In this blog post, we’re diving headfirst into the battle against mold on your trusty toothbrush sanitizer and uncovering the secrets to emerge victoriously.
Toothbrush sanitizer – it’s a term that’s been making waves in the world of dental hygiene. As our awareness of the invisible threats lurking on our toothbrushes grows, these clever devices have taken center stage. But what happens when the very tool designed to keep your toothbrush clean becomes a breeding ground for mold? Let’s unravel this mystery!
Our journey begins with the realization that your toothbrush sanitizer, the steadfast protector of your dental health, may occasionally fall victim to an unexpected intruder – mold. Yes, you heard it right; mold can stealthily infiltrate your toothbrush sanitizer, turning your defender into a cozy home for this unwanted guest.
Before we dive deeper into the battle against mold, let’s take a moment to understand what mold is and why it poses a threat to your dental hygiene.
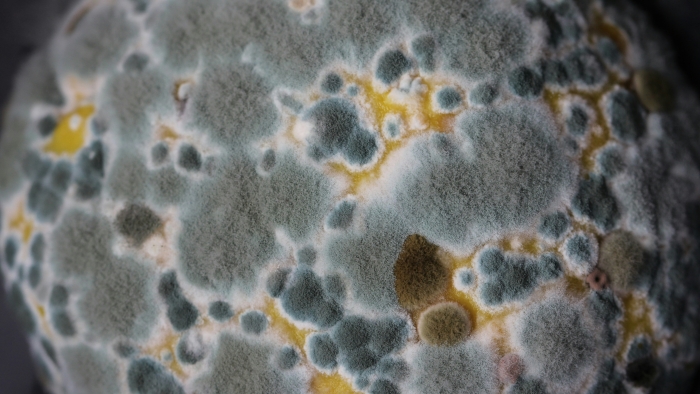
Mold is a type of fungus that thrives in moist and dark environments. It reproduces by producing spores, which can become airborne and settle on various surfaces, including your toothbrush and toothbrush sanitizer. While most molds are harmless, some can cause health issues when inhaled or ingested. Therefore, it’s essential to keep your toothbrush and its home – the toothbrush sanitizer – mold-free.
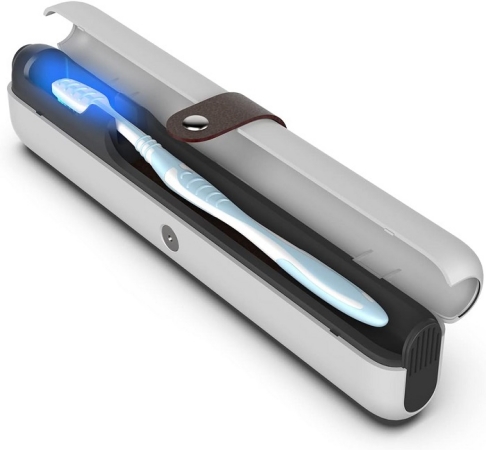
To understand how we can thwart this moldy menace, we must first explore the powerful weapon in the toothbrush sanitizer’s arsenal: UV-C light. UV-C light is the secret sauce that toothbrush sanitizers use to obliterate bacteria, viruses, and even mold. But how does it work its magic?
Let’s take a closer look at UV-C light and its germicidal properties. UV-C light is a specific type of ultraviolet light with wavelengths between 200 and 280 nanometers. It’s the most effective range for disinfection because it can destroy the genetic material of microorganisms.
UV-C light works by disrupting the DNA and RNA of microorganisms, including mold spores. This disruption prevents the microorganisms from reproducing, rendering them harmless. It’s like a light-based sterilization process, and it’s at the heart of your toothbrush sanitizer’s mold-fighting capabilities.
Before we dive deeper, let’s equip ourselves with the skills to detect a mold infestation on your toothbrush sanitizer. Recognizing the telltale signs is essential in our quest to defeat this cunning intruder.
Signs of Mold Infestation:
Mold can be tricky to spot, but it leaves behind some subtle hints that it has taken residence on your toothbrush sanitizer. Here are some common signs of mold infestation:
Now that you know what to look out for, it’s time to unveil our battle plan for conquering mold on your toothbrush sanitizer.
Now that we’re acquainted with our foe and have grasped the principles of UV-C sterilization, it’s time to unveil our battle plan for conquering mold on your toothbrush sanitizer.
This section will equip you with practical tips and strategies to vanquish mold and maintain a mold-free dental hygiene guardian.
Establishing a Mold-Free Zone:
Our primary goal is to create a mold-free zone for your toothbrush and toothbrush sanitizer. Here’s a step-by-step battle plan to ensure victory in this endeavor:
Step 1: Establish a Regular Cleaning Routine
The foundation of defense against mold lies in establishing a regular cleaning routine for your toothbrush sanitizer. We’ll delve into simple steps that you can incorporate into your daily routine to ensure your device remains clean and mold-free.
Daily Cleaning Routine:
Step 2: Deep Cleaning and Ongoing Maintenance
Sometimes, a little extra effort is required to ensure your toothbrush sanitizer stays free from mold. We’ll explore deep cleaning techniques and ongoing maintenance procedures that will help you keep your device in peak hygienic condition.
Deep Cleaning and Maintenance:
Step 3: Mold-Resistant Materials: Your Ally in the Battle
The battle against mold becomes considerably easier when you select toothbrush sanitizers crafted from mold-resistant materials. We’ll discuss various options and highlight the advantages of investing in such devices.
Mold-Resistant Materials:
Preventing mold from gaining a foothold is the most effective strategy. In this section, we’ll provide you with essential tips on how to proactively keep mold at bay, ensuring your toothbrush sanitizer remains a mold-free bastion of cleanliness.
Proactive Mold Prevention:

In conclusion, the fight against mold on your toothbrush sanitizer is a challenge, but with the right knowledge and cleaning techniques, victory is within reach. Remember, a pristine toothbrush sanitizer means cleaner teeth and a healthier smile.
So, keep those bristles sparkling, and let your toothbrush sanitizer reclaim its rightful role as the guardian of cleanliness. Mold may try to sneak in, but armed with the right strategies, you’ll emerge triumphant in this quest.